08 Sep 2017
Rescuing an instance
OpenStack compute provides a handy troubleshooting tool with rescue mode. Should a user lose an SSH key, or be otherwise not be able to boot and access an instance, say, bad IPTABLES settings or failed network configuration, rescue mode will start a minimal instance and attach the disk from the failed instance to aid in recovery.
Getting Ready
To put an instance into rescue mode, you will need the following information:
openstack command line clientopenrc file containing appropriate credentials- The name or ID of the instance
The instance we will use in this example is cookbook.test
How to do it…
To put an instance into rescue mode, use the following command:
# openstack server rescue cookbook.test
+-----------+--------------+
| Field     | Value        |
+-----------+--------------+
| adminPass | zmWJRw6C5XHk |
+-----------+--------------+
To verify an instance is in rescue mode, use the following command:
# openstack server show cookbook.test -c name -c status
+--------+---------------+
| Field  | Value         |
+--------+---------------+
| name   | cookbook.test |
| status | RESCUE        |
+--------+---------------+
Note: When in rescue mode, the disk of the instance in rescue mode is attached as a secondary. In order to access the data on the disk, you will need to mount it.
To exit rescue mode, use the following command:
# openstack server unrescue cookbook.test
Note: This command will produce no output if successful.
How it works…
The command openstack server rescue provides a rescue environment with the disk of your instance attached. First it powers off the named instance. Then, boots the rescue environment, and attaches the disks of the instance. Finally, it provides you with the login credentials for the rescue instance.
Accessing the rescue instance is done via SSH. Once logged into the rescue instance, you can mount the disk using mount <path to disk> /mnt.
Once you have completed your troubleshooting or recovery, the unrescue command reverses this process. First stopping the rescue environment, and detaching the disk. Then booting the instance as it was.
08 Sep 2017
Somewhat unique to OpenStack Nova is the ability to “shelve” an instance. Instance shelving allows you to retain the state of an instance without having it consume resources. A shelved instance will be retained as a bootable instance for a configurable amount of time, then deleted. This is useful as part of an instance lifecycle process, or to conserve resources.
Getting Ready
To shelve an instance, the following information is required:
openstack command line clientopenrc file containing appropriate credentials- The name or ID of the instance
How to do it…
To shelve an instance, the following commands are used:
Check the status of the instance
# openstack server show cookbook.test -c name -c status
+--------+---------------+
| Field  | Value         |
+--------+---------------+
| name   | cookbook.test |
| status | ACTIVE        |
+--------+---------------+
Shelve the instance
# openstack server shelve cookbook.test
Note: This command produces no output when successful. Shelving an instance may take a few moments depending on your environment.
Check the status of the instance
# openstack server show cookbook.test -c name -c addresses -c status
+-----------+-------------------+
| Field     | Value             |
+-----------+-------------------+
| addresses | public=10.1.13.9  |
| name      | cookbook.test     |
| status    | SHELVED_OFFLOADED |
+-----------+-------------------+
Note: A shelved instance will retain the addresses it has been assigned.
Un-shelving the instance
# openstack server unshelve cookbook.test
Note: This command produces no output when successful. As with shelving the instance may take a few moments to become active depending on your environment.
Check the status
# openstack server show cookbook.test -c name -c addresses -c status
+-----------+------------------+
| Field     | Value            |
+-----------+------------------+
| addresses | public=10.1.13.9 |
| name      | cookbook.test    |
| status    | ACTIVE           |
+-----------+------------------+
How it works…
When told to shelve an instance, OpenStack compute will first stop the instance. It then creates an instance snapshot to retain the state of the instance. The runtime details, such as number of vCPUs, memory, and IP addresses, are retained so that the instance can be unshelved and rescheduled at a later time.
This differs from shutdown an instance, in that the resources of a shutdown instance are still reserved on the host on which it resided, so that it can be powered back on quickly. A shelved instance however, will still show in openstack server list, while the resources that were assigned will remain available. Additionally, as the shelved instance will need to be restored from an image OpenStack compute will perform placement as if the instance were new, and starting it will take some time.
05 Sep 2017
It took me longer than I would like to admit to get tempest running in openstack-ansible, so here is how I did it, in the hopes I’ll remember (or that it will save someone else time).
Getting Started
This post assumes a relatively recent version of openstack-ansible. For this post, that is an Ocata all-in-one build (15.1.7 specifically). Log into the deployment node.
Installing Tempest
Before we can run tempest, we have to install it first. To install tempest, on the deployment node, run the following:
# cd /opt/openstack-ansible/playbooks
# openstack-ansible -vvvv os-tempest-install.yml

<<lots of output>>

PLAY RECAP *********************************************************************
aio1_utility_container-b81d907c : ok=68   changed=1    unreachable=0    failed=0
The prior command uses the openstack-ansible wrapper to pull in the appropriate variables for your openstack environment, and installs tempest.
Running tempest
To run tempest, log into the controller node (this being an AIO, it is the deployment node, controller, compute, etc). Then attach to the utility container:
# lxc-ls | grep utility

aio1_utility_container-b81d907c

# lxc-attach --name aio1_utility_container-b81d907c
root@aio1-utility-container-b81d907c:~# ls
openrc
Once attached to the utility container, activate the tempest venv:
# cd /openstack/venvs/tempest-15.1.7
# source bin/activate
Once in the venv, we need to tell Tempest what workspace to use. Fortunately, the os-tempest-install playbook prepares a tempest ‘workspace’ for you. Lets move into that directory and launch our tempest tests:
(tempest-15.1.7) # cd /openstack/venvs/tempest-15.1.7/workspace
(tempest-15.1.7) # tempest run --smoke -w 4

<<so.much.output>>

======
Totals
======
Ran: 93 tests in 773.0000 sec.
 - Passed: 80
 - Skipped: 11
 - Expected Fail: 0
 - Unexpected Success: 0
 - Failed: 2
Sum of execute time for each test: 946.8377 sec.
All done!
27 Aug 2017

This, this was the easy day. The day where one finishes driving in (Yes, driving).
Going to the Hoover Dam, and well, having an easy dinner with friends you only see a few times a year.

And last but not least, sending the final emails around the vCoffee exchange:

vCoffee Exchange
If you missed the emails, here are the details:
- Drop off: Monday, vBrownBag area in the VMTN communities space.
- Pickup: Wednesday, vBrownBag area in the VMTN communities space.
- How: Once dropped off, I’ll mix them up Secret Santa style before Wednesday.
- Also: There may or may not be a surprise to go along with it.
20 Aug 2017
There are times, like when you’re writing a book with Kevin Jackson, when you need access to your homelab while traveling. Sure you could set up a VPN, and there are plenty of decent guides for that, but, there are times when SSH is just simpler, and just sort of works.
For this to work, without opening ports on your lab firewall, we will need a server hosted somewhere else. Doesn’t have to be large, in fact a (t2.micro) instance will work just fine.
Build the cloud server
Log into your cloud provider of choise, and choose an Ubuntu flavored instance. Update, install SSH, and lock it down sone. The script linked below will do a lot of that work for you.
Note: Now that you have a JumpBox setup, you will want to lock it down some, so that not just anyone can get in. This script, not included here to keep the post short, enables a number of protections against spoofing. Disables all access inboud except for SSH, then installs and configures Aide, Fail2Ban, psad, and logwatch which will email you a daily report.
Build the JumpBox
In your lab, you will now need to configure the JumpBox to “call home”. That is, to SSH out to the cloud server, and setup up a tunnel in the reverse direction. For this we use the following script:
Once you’ve created said script, set it to executable:
chmod +x ./create_ssh_tunnel.sh
Finally, we configure it to run every minute, to bring the ssh session back up should it fail. To do that, add the following line to your crontab:
*/1 * * * * ~/create_ssh_tunnel.sh >> tunnel.log 2>&1
Connecting
Now that all the parts are in place, test a connection from your cloud server to the JumpBox:
From your console:
ssh user@cloudserver.address
From the cloud server:
ssh -l pirate -p 2222 localhost
And there you go.
14 Jul 2017
My home office gets a bit stuffy in the afternoon / early evenings. That I have west facing windows, this is not unexpected. Now, one could have solved this by adding shades, or an additional AC vent, or you know, not working past a given time.
… but that is no fun. So, I over engineered a solution using Docker, Python/Flask, and a Raspberry PI. Overkill? Maybe. Entertaining? Yup.
Build
To keep things readable, I’ve broken the build out into a few components:
- Physical prep
- Setup the Raspberry PI
- Docker
- Flask / Python
- Test & Run
Physical Preparation
As we’re doing something “IRL”, there are some parts required, and some hookups needed. The pictures in this section are borrowed from the Adafruit page for the Powerswitch Tail 2.
Parts list
You will need the following parts for this project:
Assembly
First up, connect the Powerswitc Tail to the fan. Then use jumper wires to connect it to the breadboard like this:

If that is hard to read, you are connecting the +in on the Powerswitch Tail to a numbered GPIO pin. You are then connecting the -in to a GND pin. Once you have done this, you can plug the Powerswitch Tail into 110V power.
Setup the Raspberry PI
Install HypriotOS and ensure you can login. To do this, I use the flash utility:
./flash --hostname node-00 --ssid lolwifi --password lolinternets \
    ~/Downloads/hypriotos-rpi-v1.4.0.img.zip
Once that finishes, plug the SD card into the rPI, power it on, and ensure it’s up to date:
sshpass -p hypriot /usr/local/bin/ssh-copy-id pirate@node-01.local

ssh pirate@node01.local \
    "sudo apt-get update && \
    sudo apt-get install -y git wget curl vim mosh byobu && \
    sudo apt-get dist-upgrade -y"
Docker
Next up, we need to create a Dockerfile for the container that will control the fan. Here is one to start from:
- Line 1 - Tells Docker we want to start with the Arm version of Alpine Linux
- Line 3 - Installs python, pip, build utilities, and curl so we can test.
- Line 4 - Uses pip to install python modules needed to control the fan
- Line 5 - Copies our fan control program into our Docker container. We break this script down next.
- Line 7 - Exposes port 80 so we can control the fan remotely
Flask / Python
Phew, that was a lot of work, no? Why don’t you turn on the fan and sip a cold drink? Oh… we still haven’t told python how to control the fan just yet. Place the following python into a file called fan.py.
As you’ll see in both the script and the breakdown that follows, we use the RPi GPIO library to interface with the Powerswitch Tail to turn the fan on and off. We also use Flask to provide a simple REST interface to control the fan remotely.
Here’s the script, followed by a breakdown of what it is doing:
- Line 1: Imports the GPIO library
- Lines 2&3: Import the parts of Flask we are going to use.
- Lines 5-12: Initialize the GPIO pin we are going to use
- Lines 14-16: Create a new Flask app
- Lines 18-20: Define the /status endpoint.
- This allows us to request fan status. 0 = off; 1 = on
-
| Lines 22-29: Defines the power control endpoint /power/[on |
off] |
- Line 25 turns the fan on
- Line 27 turns the fan off
- Line 29 returns the new status of the fan
- Lines 31&32: Tells python to use Flask to serve our app on all interfaces on poer 80
Running
Phew, all that hard work I broke a sweat. Let’s actually turn the fan on!
To do that, once all your files are saved, you should have a directory structure that looks like this on the Raspberry PI:
$ tree
.
├── Dockerfile
└── fan.py
Now, let’s have Docker build our image:
$ pwd
/home/pirate/projects/fan-control

$ docker build -t fan-control .
Next, run the image:
$ docker run -d -p 80:80 --restart=always --privileged fan-control python /fan.py
What this does, is tells Docker to run our container in the background, to keep it running, and to allow it access to the hardware (Needed for GPIO control). Finally, it tells Docker to start our fan controller in the container.
Controlling the fan
Now, you can control the fan. From the RPi you can do this as follows:
# Get status
$ docker exec keen_neumann curl -s http://localhost/status
0

# Turn it on
$ docker exec keen_neumann curl -s http://localhost/power/on
1
You can also do this remotely using the same curl commands, changing localhost to the IP or hostname of the RPi:
$ curl -s http://node-01.local/power/off
0

$ curl -s http://node-01.local/status
0
Resources
13 Jun 2017
Today we take a little bit of a detour into coffee land to talk about my preferred method for making coffee. Specifically, how I make an 8-Minute AeroPress.
Why 8 minutes? The trick here, is that we use the timing to get our water to within an ideal temperature range for steeping and brewing with the AeroPress. AeroPress recommends, and I have found, that along with a longer steeping time, the lower temperature produces an amazing cup of coffee.
Gear
Of course there is some gear, and disclaimer of disclaimer, these are all smile.amazon links.
Note: You don’t need these specific things. They’re the ones I’ve found to work best for me.
You’ll notice I left the actual coffee off that list. This is because that is super highly subjective. My current goto is Cottonwood from Brown Coffee Co.. Great coffee, great consistency, and roasted in a way I aspire to get to in my own roasting.
Setup
First things first, we need to get the grind right. For the Porlex Mini linked above, this is 7 “clicks”. Clicks? Yes, clicks:

On the top half of the grinder, turn the knob 6 “clicks” counterclockwise.
For other grinders you are looking for a grind a bit finer than what you’d use for French Press. This is because we’re going to be steeping for a bit longer than is typical, and want to get the extraction just so.
Process
- Fill the kettle, set it to boil
- Set the funnel into your mug
- Grind 1.25 “scoops” or about 16.5 or 17g of coffee
- Set up for an “Inverted AeroPress”:
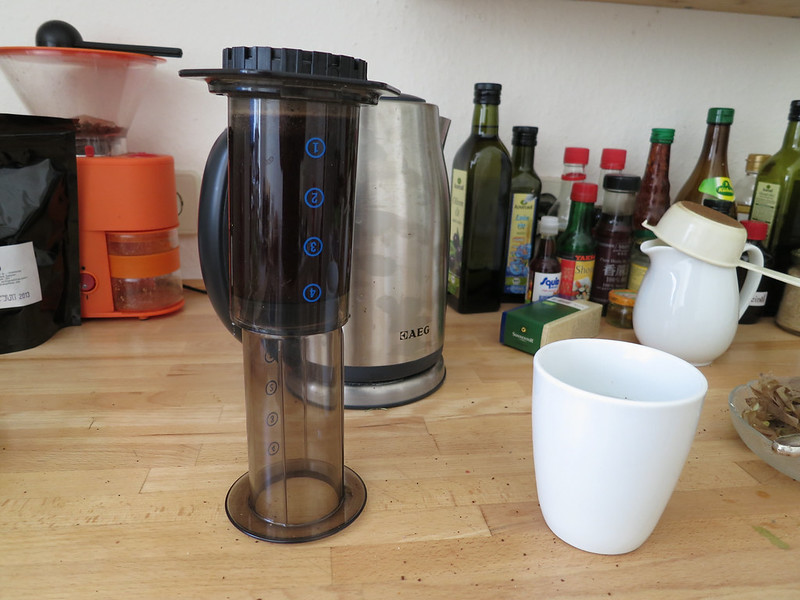
Image CC licensed
- Dump the grounds into the AeroPress.
At about this point, the kettle should be boiling and click itself off. Here is where the first 4 minutes of the 8 comes from. Set a timer for 4 minutes to let the water cool.
- Add water to the first marker (should be number 3 if inverted). About 50g
- Using the back of the scoop, stir gently
- Place the filter in the cover, place the cover filter side up, over the end of the AeroPress, and wet the filter (just wet it, we add the rest of the water later).
- Wait another 4 minutes (you see, 8 minutes)
- Add the rest of the water. I shoot to fill to about 1cm from the edge, or about 250g total in water.
- Screw filter on
- Flip into funnel and press
13 Jun 2017
I have a little alias, yes I do. I have a little alias, how about you?
Specifically, this alias keeps my box up to date, and is derived from @mathis’s excellent dotfiles:
https://github.com/mathiasbynens/dotfiles/blob/master/.aliases#L56-L57
alias update='sudo softwareupdate -i -a; \
    brew update; \
    brew upgrade; \
    brew cleanup; \
    brew cask outdated | xargs brew cask reinstall; \
    npm install npm -g; \
    npm update -g; \
    sudo gem update --system; \
    sudo gem update; \
    sudo gem cleanup; \
    vagrant plugin update; \
    sudo purge'
Hope that helps someone other than me.
12 Jun 2017
Today I needed to update the version of the UniFi Controller that runs on my UBNT Cloud Key. To do this, I basically followed the directions here.
Upgrading UniFi Controller on UBNT Cloud Key
To do the upgrade:
- Log directly into the CloudKey over ssh
- wget the new firmware
- dpkg -i new_firmware.deb
- Hop over to the web portal for any additional steps
Here is what that looks like from the cli:
 ___ ___      .__________.__
|   |   |____ |__\_  ____/__|
|   |   /    \|  ||  __) |  |   (c) 2013-2016
|   |  |   |  \  ||  \   |  |   Ubiquiti Networks, Inc.
|______|___|  /__||__/   |__|
           |_/                  http://www.ubnt.com

     Welcome to UniFi CloudKey!

root@UniFi-CloudKey:~# cd /tmp
root@UniFi-CloudKey:/tmp# wget http://dl.ubnt.com/unifi/4.8.12/unifi_sysvinit_all.deb
--2017-06-12 20:37:51--  http://dl.ubnt.com/unifi/4.8.12/unifi_sysvinit_all.deb
Resolving www.ubnt.com (www.ubnt.com)... 52.24.172.6, 35.162.195.66, 54.69.255.156
Connecting to www.ubnt.com (www.ubnt.com)|52.24.172.6|:443... connected.
HTTP request sent, awaiting response... 301 Moved Permanently
Location: http://dl.ubnt.com/unifi/4.8.12/unifi_sysvinit_all.deb [following]
converted 'http://dl.ubnt.com/unifi/4.8.12/unifi_sysvinit_all.deb' (ANSI_X3.4-1968) -> 'http://dl.ubnt.com/unifi/4.8.12/unifi_sysvinit_all.deb' (UTF-8)
--2017-06-12 20:37:52--  http://dl.ubnt.com/unifi/4.8.12/unifi_sysvinit_all.deb
Resolving dl.ubnt.com (dl.ubnt.com)... 54.230.81.210
Connecting to dl.ubnt.com (dl.ubnt.com)|54.230.81.210|:443... connected.
HTTP request sent, awaiting response... 200 OK
Length: 145135070 (138M) [application/x-debian-package]
Saving to: 'unifi_sysvinit_all.deb'

unifi_sysvinit_all.deb 100%[===========================>] 138.41M   932KB/s   in 2m 47s

2017-06-12 20:40:39 (851 KB/s) - 'unifi_sysvinit_all.deb' saved [145135070/145135070]

root@UniFi-CloudKey:/tmp# dpkg -i unifi_sysvinit_all.deb
(Reading database ... 15695 files and directories currently installed.)
Preparing to unpack unifi_sysvinit_all.deb ...
Unpacking unifi ...
Setting up unifi ...
Processing triggers for systemd ...
Once that wraps up, you can head over to your web portal. If it’s anything like mine, you’ll see a DB migration in process:

After that is done, you can log in.
Wrapping up the upgrade
If you have other UBNT gear on your network, it too may need an upgrade. For this I tend to work from the outside in. In this case that means first upgrading the AP’s, then the switch:

Rolling updates can be found under the APS tab of the UniFi interface:

With that complete, upgrade the rest as needed.
31 May 2017
A reader reached out a day or so ago to point out that the Vagrant images used in the 3rd edition of the OpenStack Cookbook had gone missing.
Why? Well, long story short, I accidentally the images.
That said, I buit new ones, which live on Atlas here.
Changes in this release:
- Updated to ubuntu 14.04.5
- Updated NIC drivers
- Virtualbox: Virtio
- VMware: vmxnet3
- Changed from preseed to kickstart
The images are still rather large. However, as we are in the process of writing the 4th edition, I’ll likely leave them that size.